Configure Geovision GV-FE3403/3402 Fisheye Camera for Cloud Recording, Remote Monitoring and Playback
Contents
Introduction
Step 1: Connect camera to the network and find IP address
1.1 Connect camera to the network
1.2 Find the Camera’s IP Address
Step 2: Configure the Camera Using the Web-based Configuration Tool
2.1 Setup or Re-configure Wi-Fi
Step 3. Configure the FTP settings
Step 4. Configure Video Profile and Image/Video Recording Options
4.1 Configure Video / Image Settings (Resolution, Frame Rate, Bit Rate)
4.2 Configure Video or Image Recording
4.3 Configure Motion Detection
5. CameraFTP Viewer
According to the manufacturer, Geovision GV-FE3403 (3402) is an outdoor 2048x1536 fisheye camera that can monitor all angles of a location.
It can be installed to the ceiling and the wall. The camera is equipped with an IR LED ring that provides infrared illumination under low-light situations. Its distorted hemispherical image of the camera can be converted into a conventional rectilinear projection. Without installing any software, you can watch live view and utilize functions such as motion detection, privacy mask, and alert notification through the Web interface.
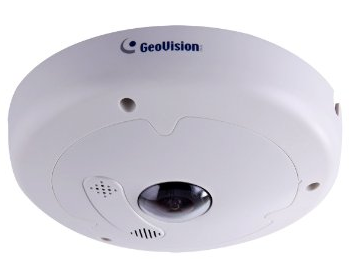
Its main features include:
- Up to 15 fps at 2048 x 1536
- Night vision with effective distance up to 10 m (32.81 ft)
- Wide Dynamic Range Pro (WDR Pro)
- POE+ (IEEE 802.3at)
- Mini USB slot for WiFi Adapter or USB hard drive
- Built-in microphone and speaker with Two-way audio support
- Provides 360° and 180° panorama view
- Privacy mask, Visual automation, Text overlay, 31 languages on Web interface
- ONVIF (Profile S) conformant
- Supports CameraFTP VSS for cloud recording
Basic camera information
| Video / image resolution |
2048x1536 (1920x1080?, 1280x720?) |
| Audio recording |
No |
| Image upload frequency |
1 image/s or lower frequencies |
| Video frame rate |
1,2,3,...,15 fps |
| Night-vision |
Up to 32 feet |
| Image snapshot recording |
Supported |
| Video clip recording |
No. |
| Motion detection |
Supported for both image based recording |
| Continuous recording |
Supported for image recording |
| Supported video format |
N/A |
| Connection type |
Wired, supports USB Wi-Fi adaptor |
| PoE (Power on Ethernet) |
Yes |
| Indoor / outdoor |
Indoor & Outdoor |
| Lowest pricing (as of 6/15/2016) |
N/A |
Note: This document is not designed to
replace the product manual from the manufacturer. The information provided is
based on our knowledge of the model Geovision GV-FE3403 (3402) Fisheye camera.
It may not be accurate or completely up-to-date. Users shall contact the
manufacturer for all camera-related issues and contact us only for
CameraFTP-related (cloud service / FTP) issues.
Most of the setup steps below are camera
related and are very trivial. If you have finished these basic steps before,
then you can skip Steps 1 and 2.
By default, this camera only supports wired connection, so you just need to connect the Ethernet cable. You can optionally connect a USB wi-fi adaptor for wireless connection.
Please refer to the manufacturer’s manual for more detailed information. Usually you will run the included IP Camera Search Tool to find the camera. If your computer
does not have a DVD/CD drive, then you can download CameraFTP VSS software to find the camera's IP address.
( After you find the camera's IP address, you can stop VSS. Note: This camera is compatible with VSS-based Cloud Recording. You can use VSS as a cloud-enabled NVR, which requires a PC. )
Most IP cameras don't support Chrome, incl. this camera. So you need to use Microsoft's Internet Explorer (not Microsoft Edge). Launch IE, and visit:
http://IP_ADDRESS/(e.g. http://192.168.1.15)
You must install the OCX (ActiveX/Plugin) before you can configure this camera. If your browser does not allow installing of the OCX control, you can add the web site address into your browser's Trusted websites and set the security to the lowest.
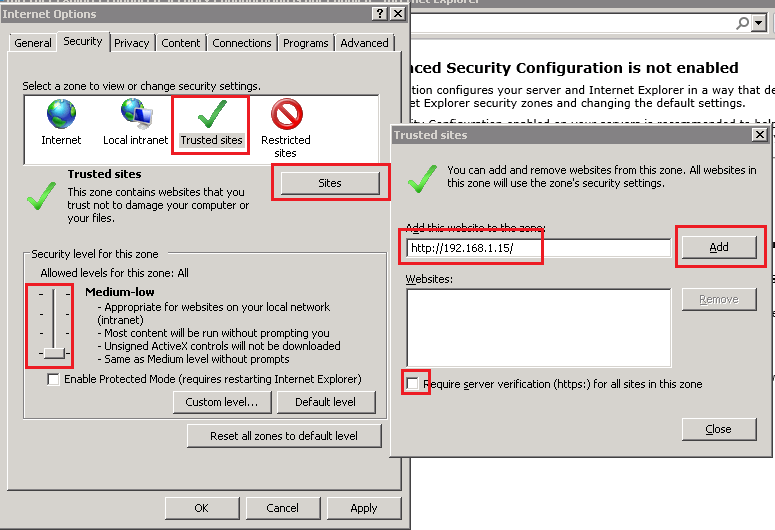
Log on with the default username
admin, and the default password admin. (It is recommended
that you change the password.)
After logon, you will see the Setup Main screen. Click Events & Alerts, and then click the FTP tab, you can enter the FTP information as shown in the screenshot below.
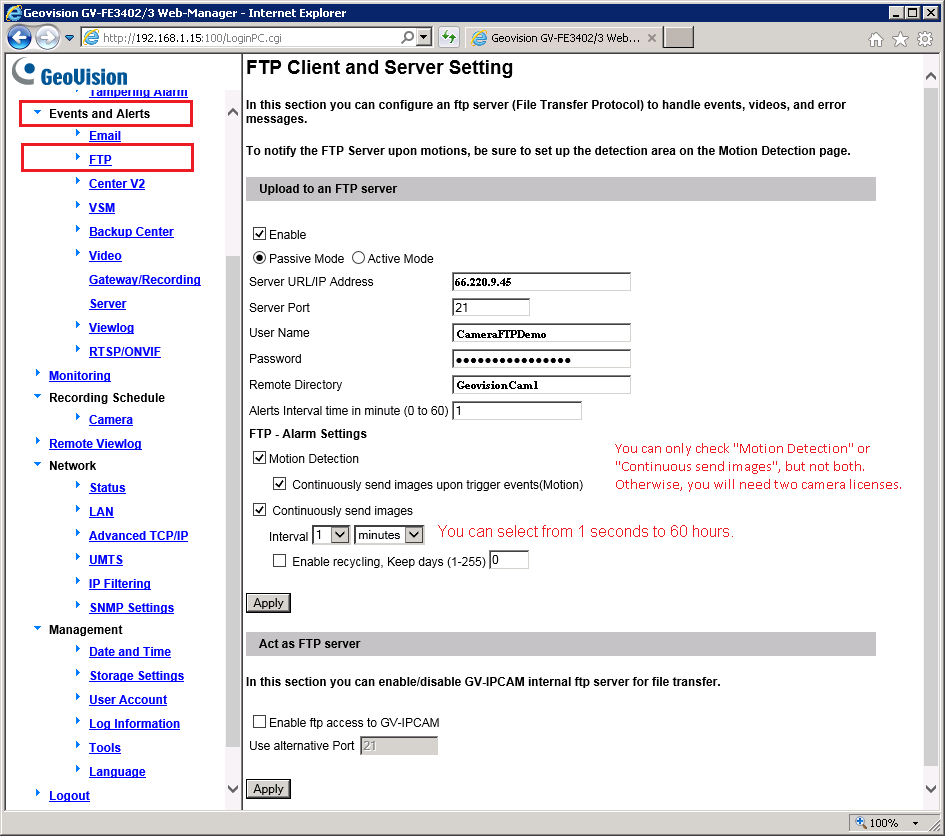
With CameraFTP's service, most regular setup steps are not required. (You can check
these steps in the Camera Configuration screen to make sure everything is configured correctly).
Click Events & Alerts à FTP, you can see the screen as follows. If you don't already have an account on
CameraFTP, please visit www.cameraftp.com and
sign up a free trial account. CameraFTP offers 3-day free trial. When the trial
ends, you will need to order a subscription to continue using the service.
Assuming you already have a CameraFTP Account, then you need to enter the following info:
- FTP Server: ftp.cameraftp.com (or IP: 66.220.9.45)
- Port: 21
- FTP Mode: Passive Mode (This camera uses PASV by default. No configuration is needed)
- FTP Path: You camera folder path.
- Username / Password:
FTP username is your CameraFTP username, FTP password is available in
Configure IP Cameras page. (Your CameraFTP password may also work).
Note:
In the above screenshot, GeoVisionCam1 is the folder name, which is the
same as the camera name that you created on www.CameraFTP.com website
when you added a new camera.
Click Save to save the settings. After that, you need to configure the video / image resolution.
This camera only supports image snapshot-based uploading. Please make sure you ordered an image recording plan.
In the Video & Motion tab, click “Video Settings”, then click Stream1. Note, the recorded image size will be the same as the video resolution.
The resolution and frame rate should be based on the plan you subscribed to;
The Bit Rate is a little tricky. Setting it too high will use too much bandwidth,
thus dramatically slow down your network, causing failed uploads; setting it
too low will affect the video quality. You can use our bandwidth calculator to
estimate the bandwidth. Visit www.cameraftp.com,
click Pricing, and then customize a service plan. See the screenshot below.
Note for estimating the bandwidth, Number of Cameras should be set to 1.
Click Save to save the video settings.
If you ordered an image recording plan, then you should configure FTP Alarm Settings to upload image "snapshots to FTP server". .
- If you ordered a motion recording plan, please check the checkbox of "Motion Detection", and "Continuously Send Images Upon Trigger Events".
-
If you ordered a continuous recording plan, please check the checkbox of "Continuosly Send Images", and select an upload interval based on the plan you ordered.
For the image recording plan, you can set it to 1 image/second to 1 image/60 hours.
Click the Video and Motion tab à Motion Detection as shown below.
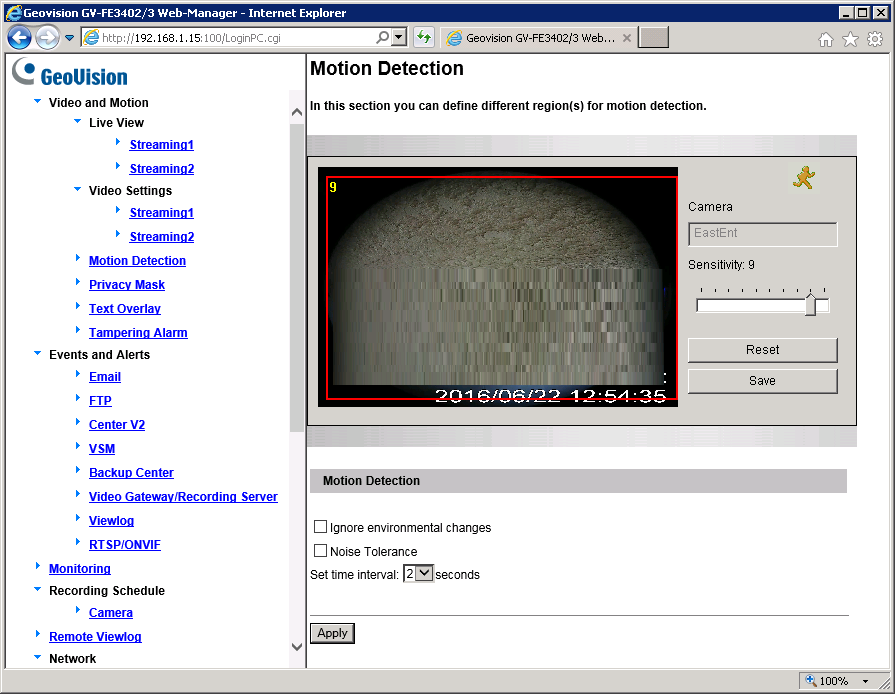
Just draw a rectangle and set the motion sensitivity. For motion-triggered recording plans.
Click Save and then Apply to save the change.
Click Recording Schedule and then click Camera, you will see the followin screen:
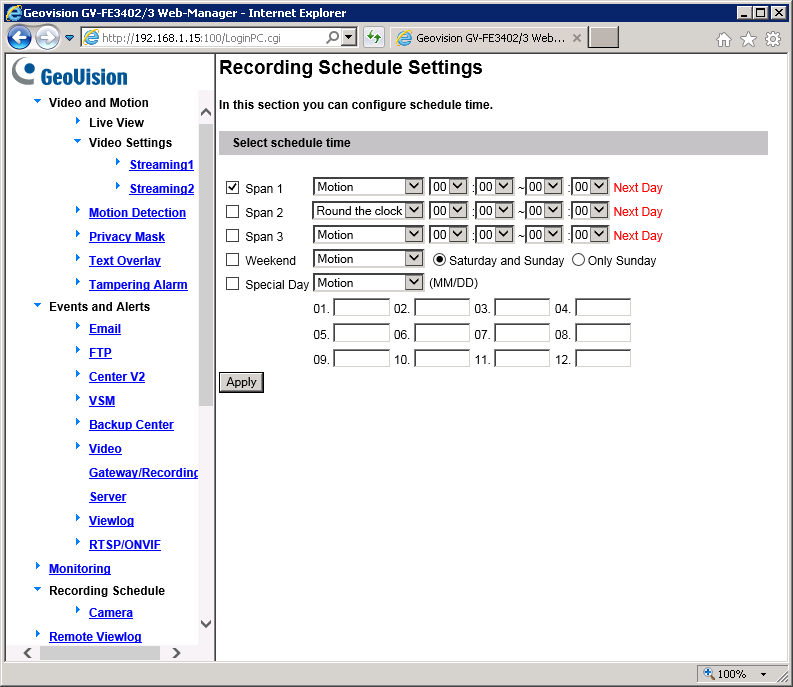
In most cases, you will select all times as shown in the screenshot. Finally, you need to start monitoring before this camera can start uploading images.
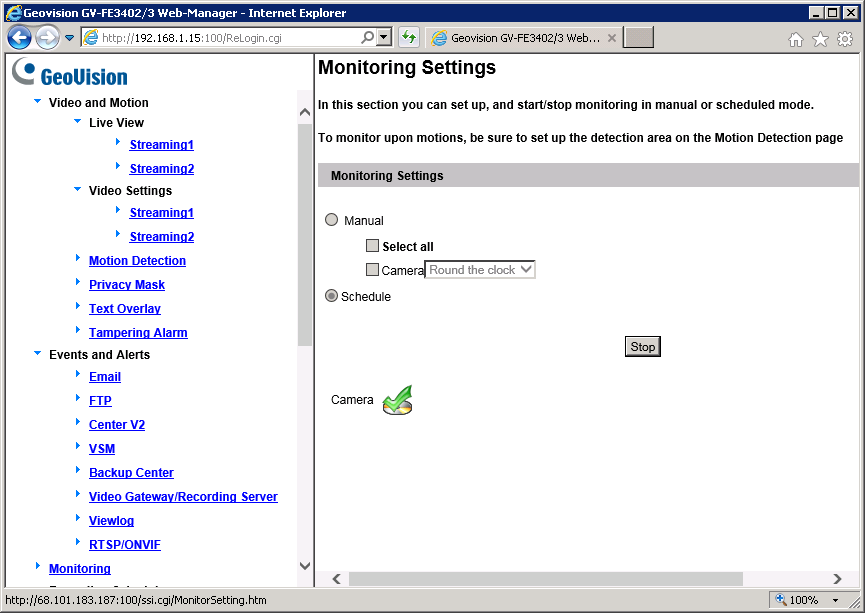
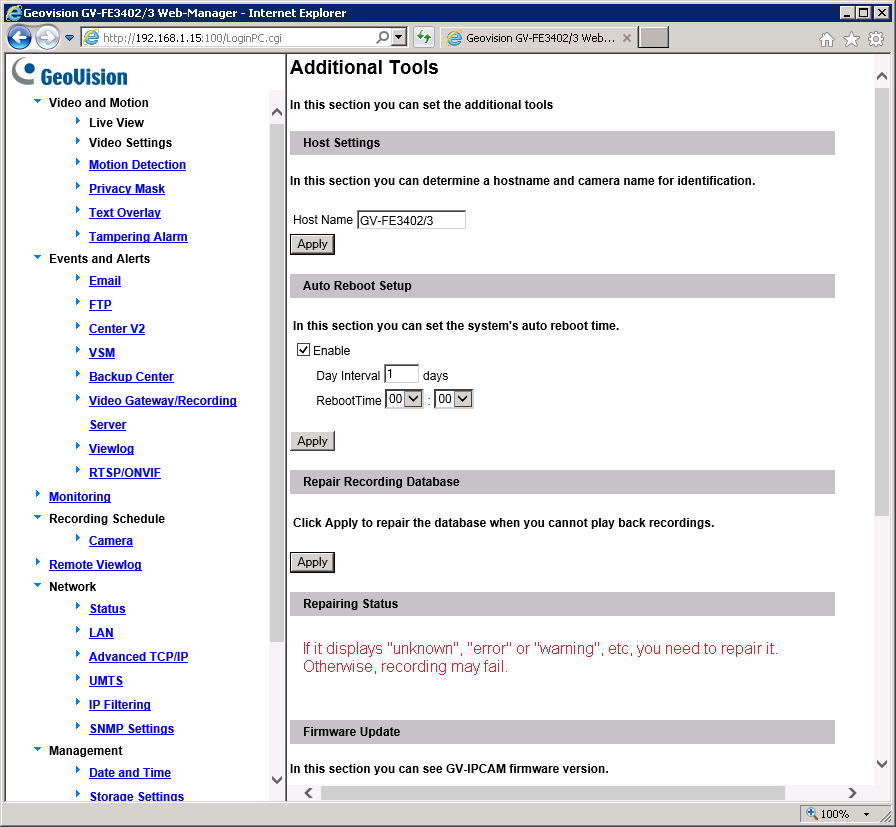
You are all done! Note if everything is configured correctly and the camera still does not upload, you might want to try "Repare Recording Database" and reboot the camera.
After your camera is setup, you can
visit www.cameraftp.com to view
or play back your recorded footage from anywhere. You can also download
CameraFTP Viewer App for iOS, Android and Windows Phone.
Note: This camera is compatible with VSS-based Live View, Cloud Recording and Local Recording. You can use VSS as a cloud-enabled NVR, which requires a PC.
Cannot get it to work? Please read our
Trouble-shooting Guide.